
When you’re driving fast, and the weather hits you with rain/snow, debris, sunlight, and the wind, the trip can quickly turn into a disaster. If it’s a hot summer, all that dust, pollen, and rain will mess up the. Plus, the windows will get covered by mist, not to mention the sun glare will blind your eyes, potentially causing an accident.
Well, that won’t be a problem with deflectors. Even when it’s really cold outside, you’ll still be able to open the windows a bit and enjoy the fresh air. Yes, they’re pretty great. Deflectors are available for cheap, can be bought both locally and online, and won’t take much effort to maintain. So, if you want to learn how to install them properly, this step-by-step guide is for you!
What to Look for in a Set of Windows Deflectors?
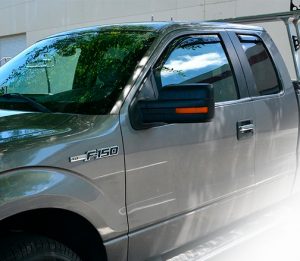 Also known as the wind deflectors and the window protectors, deflectors are actually pretty simple in design. So, what are the most important factors to consider before making a purchase? First of all, make sure they’re a direct fit with the F150. That way, no drilling, cutting, or any special equipment will be needed for the installation.
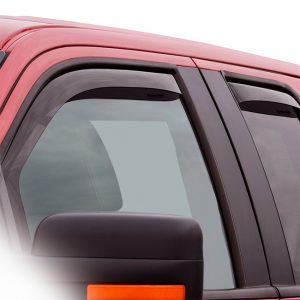
Precision engineering and custom molding will also ensure an effortless mounting process. As for the material, the vast majority of window deflectors on the market are made from transparent thermoplastic. I recommend going with acrylic, as it has proven to be reliable and 100% safe. It comes pre-tinted and protected against UV rays. It should be scratch-resistant as well; otherwise, you’ll end up with ruined deflectors before long.
Warranties and Pricing
 Last, but not least, choose window deflectors that were made in the US and include at least a one-year warranty. Some brands back their products with a limited lifetime guarantee. Others provide a 60-day manufacturing defect and fitment warranty. And what about the average price, you might ask? Right now, a premium-quality set of four will cost you 15-20 US dollars.
Now, there are some expensive packs that cost 50-60 bucks. But, those usually include more deflectors than a truck like the F150 needs. Plus, they come packed with adhesive tape, a solution for treating the frames, and (sometimes) quite generous warranties. But, I’d still go with the $15-20 range.
Step #1: Preparations
I’ve got good news for you: the installation process will take very little time and effort. Thanks to the clever, flexible design, most deflectors can be mounted in less than five minutes. You won’t need any bolts, nuts, washers, screws, or any extra instruments. The only thing required is strong adhesive tape or clips. The 3M tape is the best option on the market right now; some manufacturers include them in the package.
But, if you didn’t get one, it’s no big deal. The tape is even cheaper than the deflectors and is available at local stores. It has a very strong grip and is ideal for attaching wind deflectors to your F150 truck. Do keep in mind, though, that before using the tape, it’s highly recommended to clean the window frames. They collect a lot of dust, dirt, and grease over the years, especially if you do a lot of off-roading on the weekends.
In my experience, degreasing wipes are great for this. A big canister will cost you 5-10 dollars and will be more than enough to clean every single frame of the pickup truck. While you’re at it, get a window cleaner and give the windows a good “bath” as well. Wipe everything off with a dry cloth before you move on. The very bottom of the frame may be hard to reach with a piece of cloth. For that, use a screwdriver to scrape everything off (be careful with it, though).
Step #2: Installation
We begin the installation by rolling down the windows – you won’t be able to do this properly when the windows are up. Grab the 3M tape and peel off one side, but don’t go all the way: carefully put the deflector along the top of the trim and try to align it with the frame. Once you’re happy with the deflector’s position, peel off the rest of the strip off the tape and apply pressure to the window deflector to secure it.
You won’t have to be doing that for long: 30-60 seconds should be more than enough for it to stick to the frame. Next, shake it a bit. If the deflector is moving, that means there’s something wrong with the tape, or you didn’t align the deflector properly. You could try applying even more pressure. Or, better yet, remove the 3M tape, add a new one, and try again. The deflector needs to repeat the shape of the F150’s window perfectly.
Using Clips instead of Tape
True, the 3M adhesive tape is the best option for securing window deflectors. However, you can also use adhesive clips. That’s right: some deflectors come packed with tiny clips that do a pretty decent job of holding everything in place. Lift the deflector, push it into the top window channel, and slightly press on the sides and the middle. The deflector might deform a bit under the pressure, but don’t worry about it.
It will go back to normal in a minute or two. That’s when you’ll be able to fit the bottom half of it. Next, use the provided clips to secure it. If the package includes instructions, they’ll tell you exactly where to put those clips. Roll the window up and down a couple of times to make sure the deflector isn’t interfering with it. Then, roll it all the way up and let the deflector “sit” for at least 24 hours.
Do the same with the remaining windows, and that’s pretty much it!