The F250 super-duty pickup truck is a mean beast. It easily handles the roughest terrain and rarely breaks down. It’s also pretty decent on the electronics side. The built-in dashboard is neat, informative, and very user-friendly. Like any other Ford vehicle, it’s got a line-up of gauges to keep the driver up to speed on the engine, transmission, and other systems.
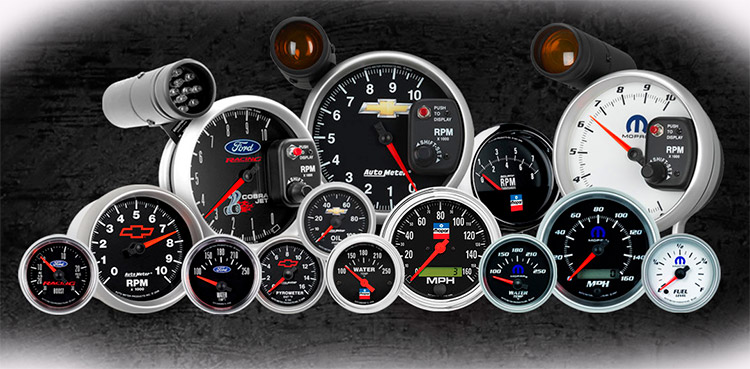
Now, if you’re a bit tired of the factory setup, or if it’s time for a replacement, Autometer could be the right brand for you. This company has been around for a really long time, and, thanks to the attractive pricing policy and easy installation, its gauges are pretty popular. So, in this detailed guide, we’ll learn how to install Autometer Gauges on the F250!
What are Truck Gauges all about?
Gauges are diagnostics tools – nothing more, nothing less. They don’t affect the powertrain in any way and can’t give you a boost in HP, torque, or acceleration. However, they are a vital component of any truck, because, without them, you won’t be able to figure out what’s wrong with the F250 when it starts to malfunction. According to the experts, the battery voltage, oil pressure, and engine coolant temperature gauges are the most important ones.
And, there are lots of Autometer gauges kits that cover these three parameters. They aren’t very expensive and take less time to install than if you had to wire all the gauges individually. Plus, they don’t go into the dashboard. These gauges come built into a pillar that mounts on the factory pillar. Of course, it’s very important for the kit to be compatible with your truck. Otherwise, the installation process will turn into one big headache.
Autometer has a pretty decent line-up of Ford factory match gauges. Remember: it’s all about the engine. Don’t forget to check the specs to see which motors are supported. Most Ford F250 trucks come equipped with the mighty 6.7-lit Powerstroke V8. It’s a turbo-diesel unit. Gasoline is an option as well; but, in my experience, the Autometer gauges go better with the Powerstroke.
What you’ll need for the Job
 As mentioned earlier, Autometer specializes in triple gauge kits. So, today, we’ll learn how to install one of their trademark three-gauge sets. To complete the installation, you’ll need a specific set of tools. Don’t worry: they’re not very expensive or hard to find. First of all, make sure you’ve got a working drill. As for the drill bits, a 5/16-inch and 3/16-inch would be enough. Next, equip yourself with a standard set of wrenches and sockets.
That’s not all, though: side cutters, wire crimpers and strippers will be very useful as well, along with a soldering iron. Speaking of wires, you’ll need about four inches of black, white, and red wire. Last, but not least, pack a set of spade terminals, ring terminals, a fuse, an electric tape, and a couple of zip ties for neat wiring.
Getting Started – Grounding
Before you start, disconnect the negative battery terminal to protect yourself and the truck’s electronics. To make the installation process easier, I suggest pre-wiring the gauges before installing them into the F250. And don’t be greedy with the wires: make sure you’ve got enough extra. For the lighting, it would be best to wire the grounds together. That way, you’ll get one single lighting ground, instead of many.
Don’t forget to mark them to be able to separate the different wires later on. Do the same with the gauge grounds. Oh, and remember: it’s highly recommended to ground them apart from the lighting cables.
Wiring and Installing the Gauges
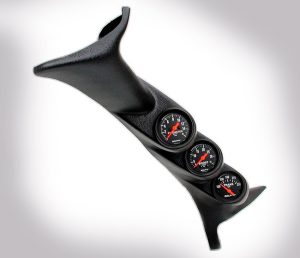 For this guide, I used an Autometer kit with a pyrometer, a transmission temperature gauge, and a boost gauge. The installation/wiring process won’t be that different if you have other gauges in the pillar. Now, if you have a setup like mine, wire the transmission gauge and the pyrometer powers together and run a wire from the transmission temp gauge’s S terminal.
The pyrometer leads come next: install them onto the gauge. It can be a bit tricky to figure out the wiring and the terminals. So, here’s what you need to do: keep your eyes on the yellow wire. The wire’s end with really big holes in the terminals should be connected to the gauge. With that out of the way, carefully install the boost gauge line adapter and unroll the line.
Then, slide the nut and the coupling onto that line and insert the line with the nut and the coupling onto the adapter. Tighten the whole thing, but don’t apply too much pressure. Grab one of those zip ties and tidy up the wires. That’s it for the first step of the how to wire Autometer gauges guide!
Moving on to the Pillar
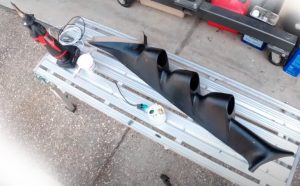
With the wires bundled together, put them through the factory pillar (the lower grab-handle hole, to be exact). Everything’s looking good? Great, install the brand-new pillar on top of the stock pillar. Yes, do that while the wires are hanging out of the F250’s factory pillar. Make sure the new pillar is positioned the way you want it because the next step would be to drill holes into both pillars.
It would be best if someone could help you by holding the pillars while you’re busy drilling. The holes are for the rivets, by the way; so, push them in. Again, it’s vital for the new pillar to align perfectly with the stock one. And once the pillar is secure, get under the dashboard and push the headlights switch out. Don’t be afraid – you won’t damage it. It should have lots of wires – we need the blue one, with a thin red stripe.
Grab the wire strippers, strip +/- ¼ inches of this wire, and connect it to the white lightning wire of your gauge set. Solder the whole thing and use some tape for protection. Put the headlight switch back.
The Fuse Box
Can you see the lower dashboard panel? You’ll have to remove it to get your hands on the fuse box. It will have a cover – get rid of it. What we’re looking for here is a tiny 15a fuse on the bottom right side of the box. Carefully remove it and install it into the so-called Add-a-Circuit kit. You’ll also need to install a 3a fuse into this kit (on the wire side). The kit has a red wire: solder it to the red wire from the pillar to form a stable connection.
Put the cover back on, but don’t forget to make a tiny hole for the red wire to run through. We’re not done with the wires yet: the truck’s stock grounds can be found on the right side of the fuse box. What you should do is run the lightning ground we made earlier to one of the F250 factory grounds. If you do everything correctly, the gauge lights will start to work.
Finishing Up
We’re almost there! Next on the menu is a rubber grommet. Make a hole for it in the firewall and run all your cables (the ground wire and the leads/wires for all three gauges) through it. You might want to use a spray on the wires; otherwise, they will be stuck in the tight grommet. For the gauge ground wire, any spot on the engine will do – go ahead and connect it.
The boost line needs to be routed to the MAP sensor. The sensor has a hose – cut it in half and connect both ends to a T-fitting. The pyrometer leads, in turn, should be routed down to the truck’s underside. Drill a hole in the manifold and put a pipe tap into it (don’t go all the way in, though). Your probe should have a double fitting: install it into the tap. As for the probe, it goes into the fitting.
The wires come next. Connect the red probe wire to the lead; do the same with the yellow wire and lead. Last, but not least, run the transmission temp wire through the same path as the yellow wire. The transmission pan has a plug – remove it and put the temp sender in its place. Solder a terminal onto the sender wire, and that’s it!