
Removing a car stereo from your vehicle can be a daunting task. Knowing how to do it safely and properly is essential for avoiding damage to the interior of the car, as well as to you. This step-by-step guide will show you how to safely remove a car stereo from your vehicle in a few simple steps.
Safety Precautions
When removing any electrical components from your car, it’s important to take certain safety precautions. Before you begin, make sure that the engine of the car is off and all power sources have been disconnected. Additionally, wear protective gear such as safety glasses and gloves in case of any unexpected accidents or sparks. Also interesting what is the cost to install a car radio.
Prepare Your Tools
To remove your stereo, you will need some basic tools such as Phillips head screwdrivers, flathead screwdrivers and pliers. You may also need specialty tools depending on your model of radio or dashboard layout – check with an auto shop if necessary or consult your manufacturer’s manual for specific details on what tools are needed for removal.
Disconnect Wires and Components
Before beginning to unscrew the mounting brackets around the radio itself, it’s important to disconnect all wires and components from the unit. Depending on your stereo model, this could include a power cable, antenna cable, speakers and/or a wiring harness. It’s important to properly label each wire or component as you disconnect them so that you can easily put everything back in place when reinstalling the unit.
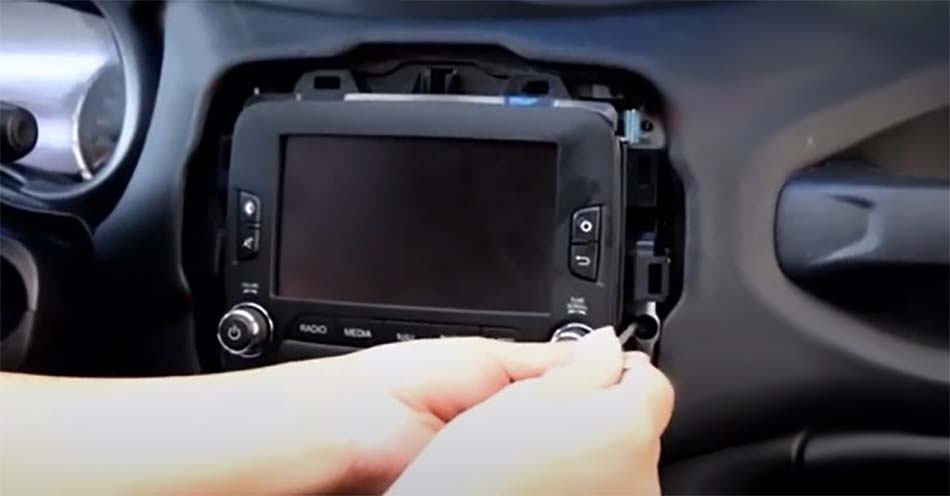
Unscrew the Stereo Housing
Using your screwdrivers and pliers, begin unscrewing all mounting brackets around the radio. Make sure to keep track of any screws that come out so that they can be reused during the reapplication of the stereo. Once all screws have been removed, gently tug on the edges of the radio until it comes free of its housing.
Pull Out The Radio And Mounting Brackets
Carefully lift out both the stereo and its mounting brackets from their housing. If there are any plastic or foam inserts behind or within these parts, make sure not to damage them during removal as they may be necessary for proper installation later on.
Reinstall Any Removed Parts
Before proceeding with installation of a new radio unit in your car, take a few moments to reinstall any parts removed during disassembly – such as plastic trim pieces or foam inserts – in order to ensure that they are not damaged or lost. Now that you know how to properly remove a car stereo, you can easily do so in your own vehicle with confidence. Be sure to follow all safety precautions and use the right tools for the job to ensure a smooth process.